Small sealed subwoofer stands for desktop monitor speakers
- Tang Band W6-1139SIF 6.5″ woofer
- Sealed cabinet with around 10 litre volume
- Form factor to fit behind computer monitors; white paint and black fabric finish to fit desktop environment
- Linkwitz Transform and digital room correction on miniDSP
- Woofer size and cabinet size limit performance but gives solid boost for small speakers
Introduction – Genelec desktop monitors
I have had my Genelec 8020B active monitors for six years now. These are the second smallest in the series from the well-respected Finnish manufacturer of studio monitors. Besides studios, nowadays Genelecs are extensively seen on desktops and home theatres as well. The size and capability difference between the smallest and the largest model is huge, as is the price difference – the models range from tiny £400/pair monitors to £6000/pair automatically DSP-corrected beasts. And then we have the actual big professional studio models…

Genelec 8020B
The enclosure is cast aluminium with metal grills so the construction is sturdy to say the least. Besides rugged construction, there is a tripod thread at the bottom and only XLR input, reminding its original aim at studios. However, the G-series and the 8020-equivalent G2 are more aimed at home with RCA connector (larger models have both), auto shutdown etc. They also have Class D amplifiers unlike this older model. Also in the 8000-series, since my 8020B there has been 8020C and now 8020D which also has Class D amps. I am not sure about other changes.
Common to all Genelec models is excellent larger-than-size sound with impressive details and neutral tone. Not all like to have such speakers when enjoying music though. Sometimes I would also like to listen to slightly different kind of speakers; nevertheless, these small monitors work extremely well in near field listening – especially when paired with a DSP to iron out the largest room response bumps.

Desktop before Bass Stands
Desktop bass stands
While the monitors can be placed on tabletop, they are best lifted at around ear level. Therefore, stands are necessary. For a while I had been using the small Neewer light stands shown on the photo above. These have a smaller 1/4″ thread but can be easily fitted to Genelecs’ 3/8″ thread with an adapter.
Since setting up the light stands I had been thinking I could make stands with woofers to act as speaker stands and small subwoofers; although calling such small speakers subwoofer may be slight overstatement. Genelecs have solid low frequency response considering their small size but one cannot overcome the laws of physics here – size does set restrictions.
Bass Stand design
Based on articles online (I just don’t remember which anymore) I decided to use Tang Band W6-1139SIF woofer. It is a 6.5″ paper woofer with relatively long 11.5 mm stroke and works in a small cabinet. It is advertised as a kit with two passive radiators but as I already had a DSP in my system, I wanted to use Linkwitz Transform (LT). Briefly, LT is a filter that electrically boosts response to go lower (see references at the end). The downside in this is heavily increased power requirement which then quickly leads to the woofer excursion limits. As the power rating for this woofer is only 50 W (100 W max) I did realise this is a possible issue.
I simulated the woofer in WinISD using around 10 litre sealed cabinet and then added the LT. To limit the excursion at lower end, high-pass subsonic filter is also required. It was clear power levels are very limited but I thought this would be enough for near-field listening, especially when having two of them.
WinISD graphs
Following graphs were actually drawn for 8.5 litre cabinet, while it eventually got a bit larger. However, it works as a good example.
First is the response without any filters. -3 dB point is around 65 Hz.
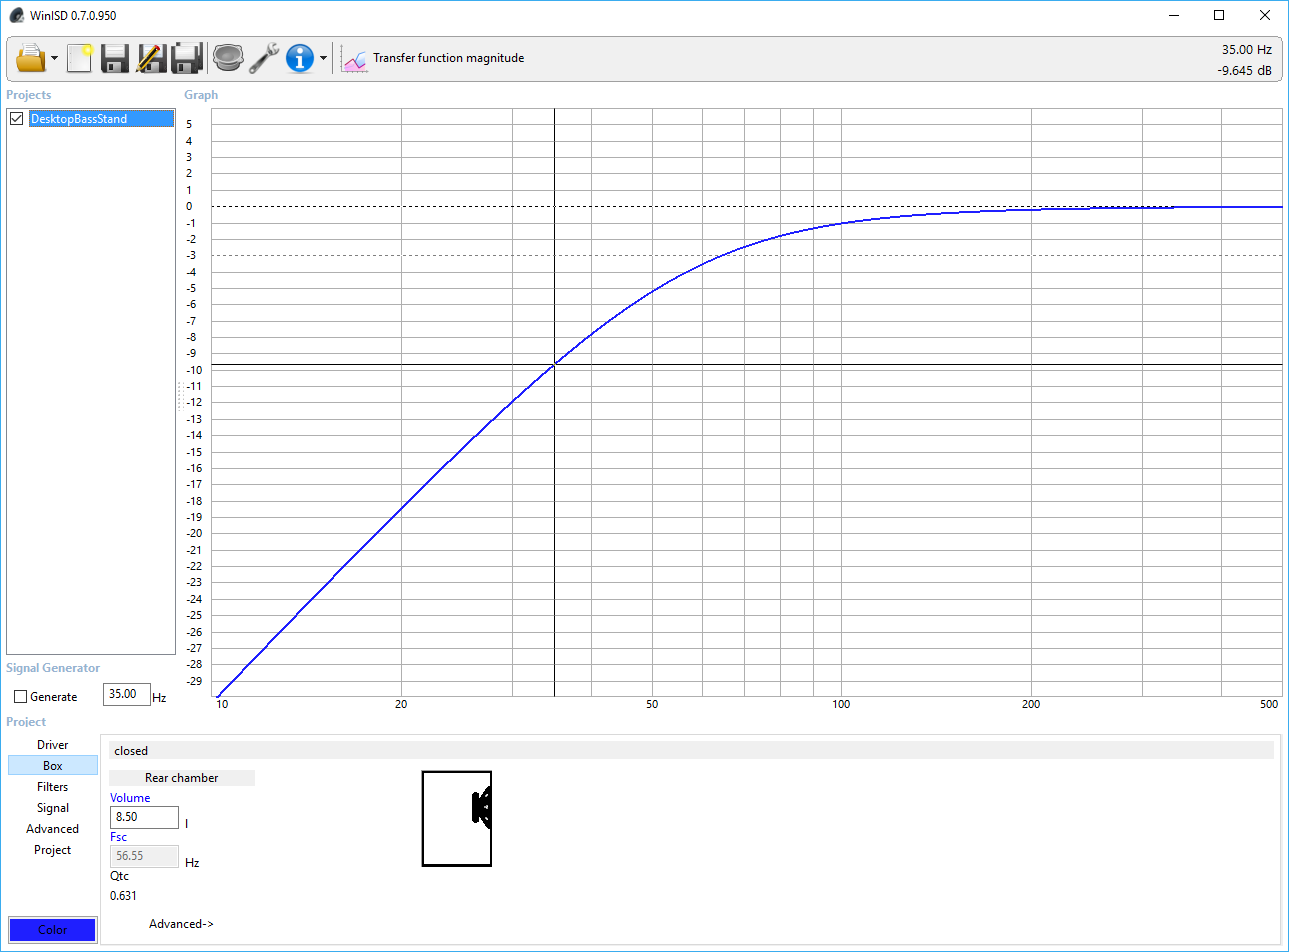
Response in sealed cabinet without filters
Next aggressive 30 Hz 0.71 Q Linkwitz Transform is applied. This means it’s electrically boosting the response flat so that -3 dB point becomes 30 Hz. From above it can be seen 30 Hz point was -12 dB, therefore it applies gain that reaches 9 dB at 30 Hz. This means almost 10 times more power at 30 Hz.

30 Hz Q=0.71 LT applied
WinISD can also estimate SPL and woofer excursion with given power level. Below is the excursion at 10 W. Even at this low input the excursion exceeds the woofer limit (red line) at low frequencies. This is due to the high boost; actual power level is more than 10 W and this small woofer has very limited power handling.

Woofer excursion
Next I tried adding 25 Hz fourth order high-pass filter. This keeps the lowest frequency excursion under control without significantly affecting the practical response.
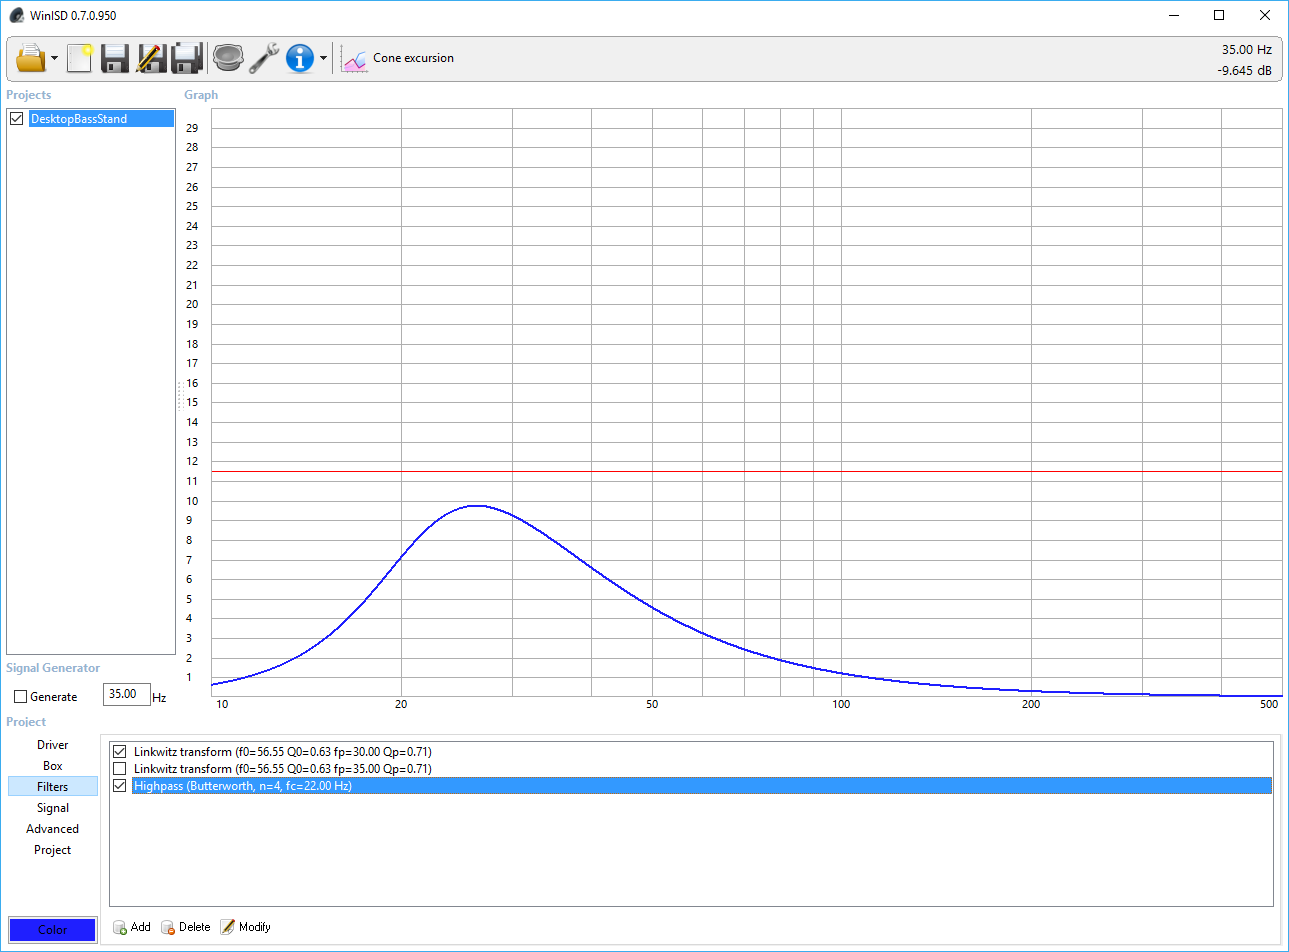
Woofer excursion with subsonic filter
This kind of playing around gives an idea what will be happening there but is obviously rather theoretical.
Besides possible serious limitations and risks here I decided to go for it. After all, I will be using DSP so altering LT and subsonic filter is easy.
Building the bass stands
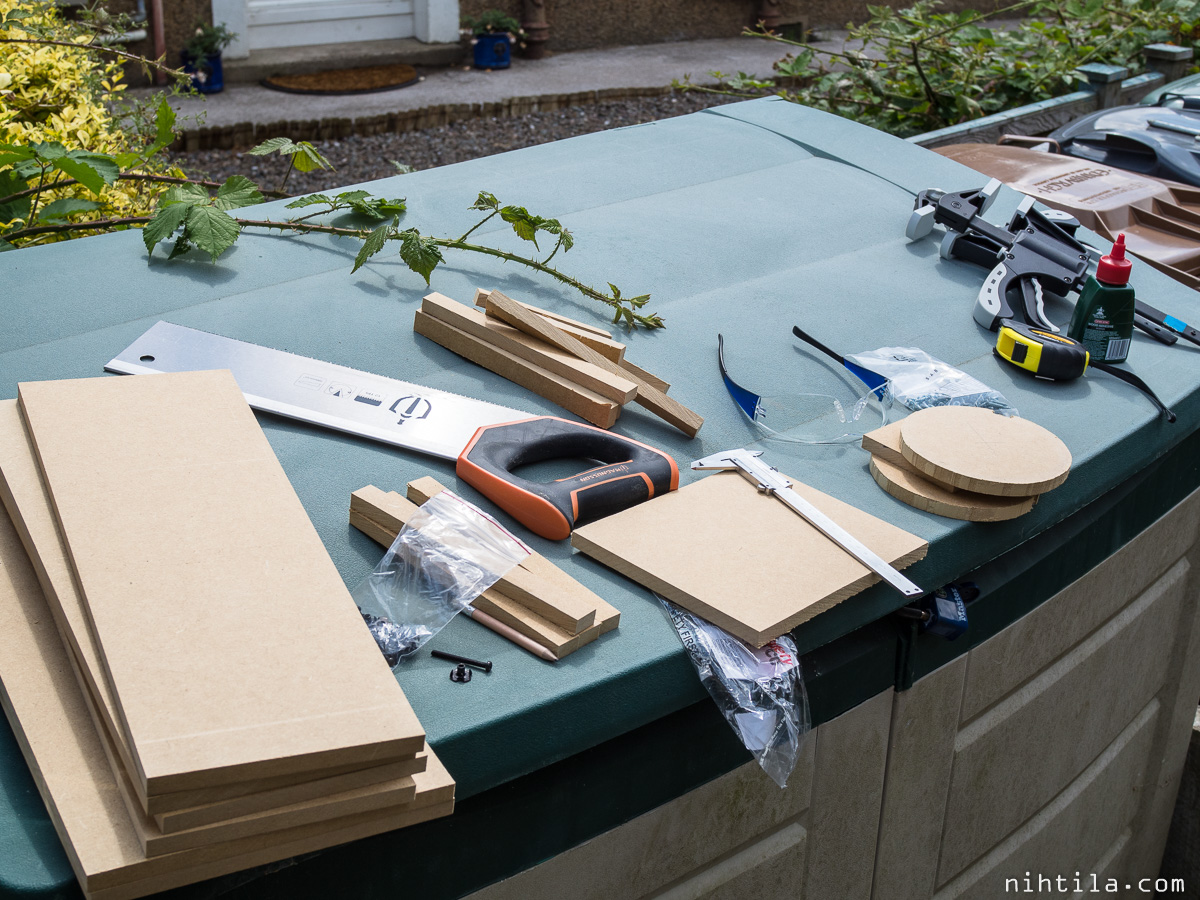
I could not find a distributor for the woofers in the UK so I got them from Blue Planet Acoustic in Germany. I ordered 12mm MDF cut to size using an eBay seller where you can leave a quote, then they reply you, and create a custom item if you wish to continue. It worked really well and price was excellent. The rest of the bits are from eBay and B&Q.
The idea was to make cabinets with small footprint to fit behind the PC monitors and make them tall enough so that the main speakers come above the monitors. Finish would be just black speaker fabric around the stand, with white top and bottom plates.
To be honest the assembly phase took few months in total as it was on halt for a while, although assembling the cabinets was only a day job.
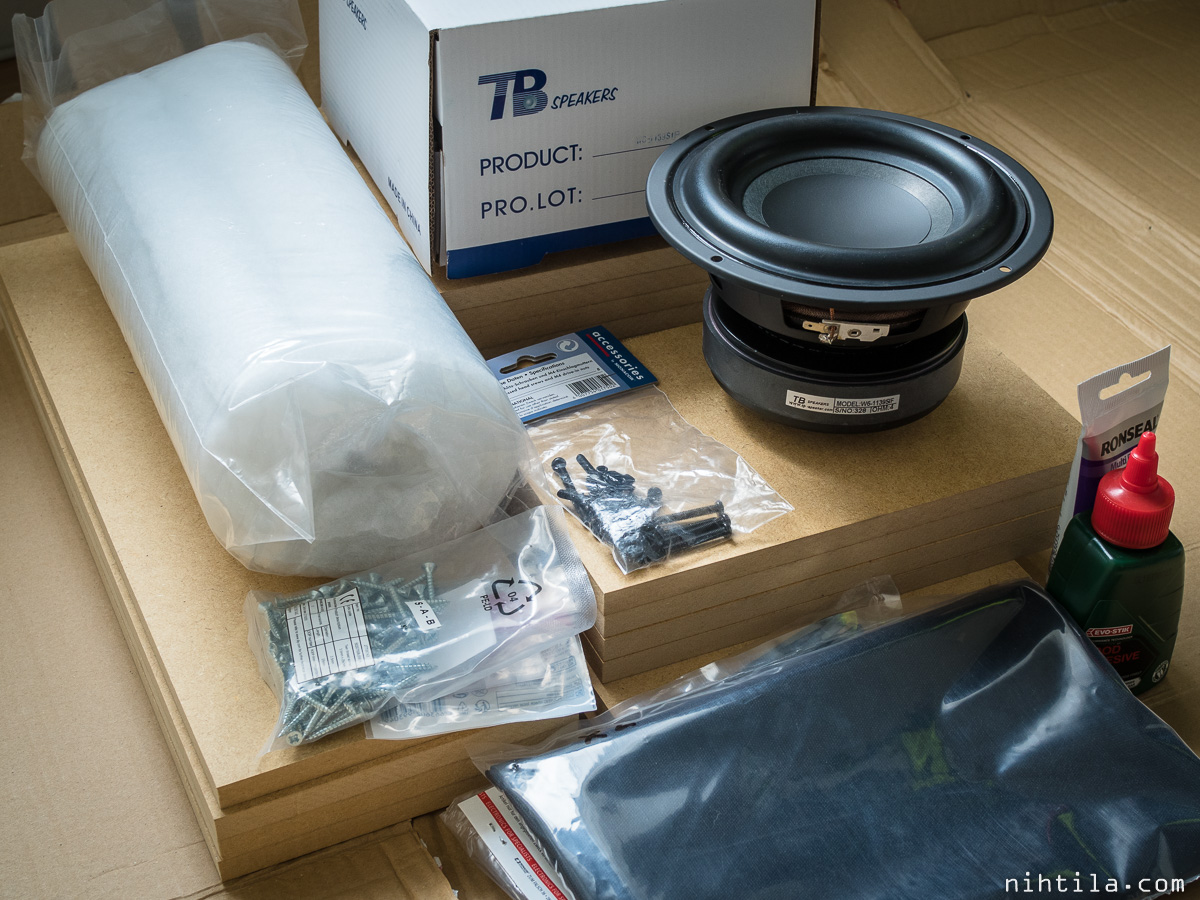
Parts ready for assembly
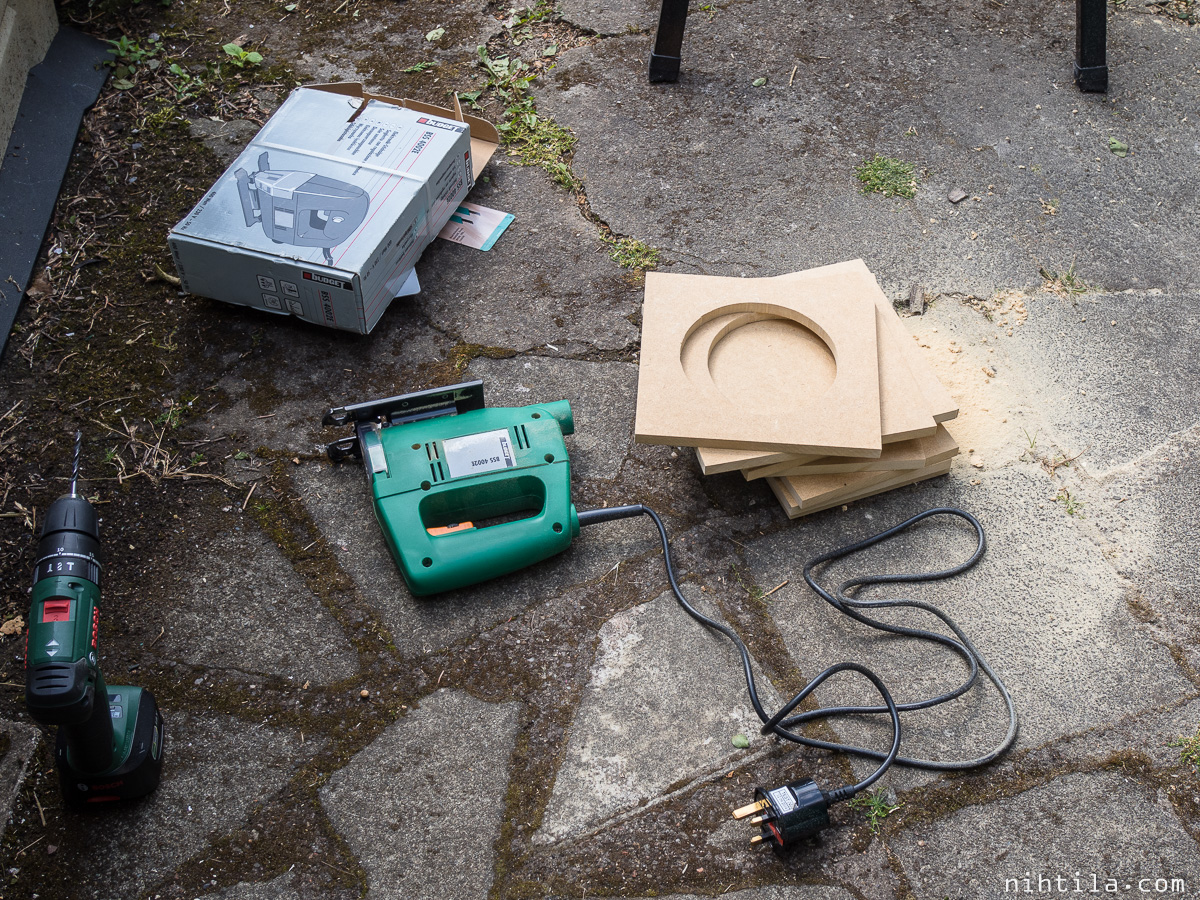
Cabinet work in the garden
Small bits are for internal support
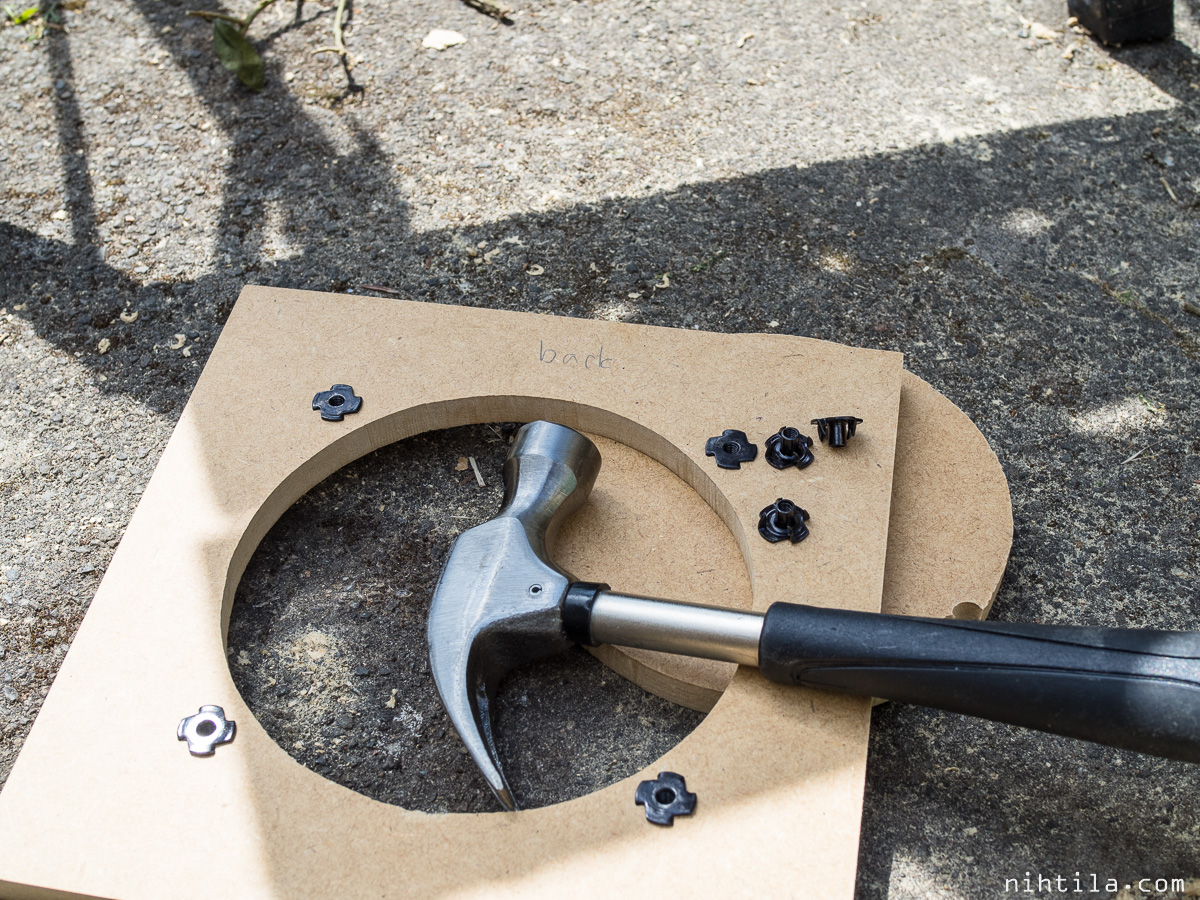
Wood nuts are durable solution for drivers – just remember to put them before adhesive!

Both adhesive and screws were used (except for the top plate)
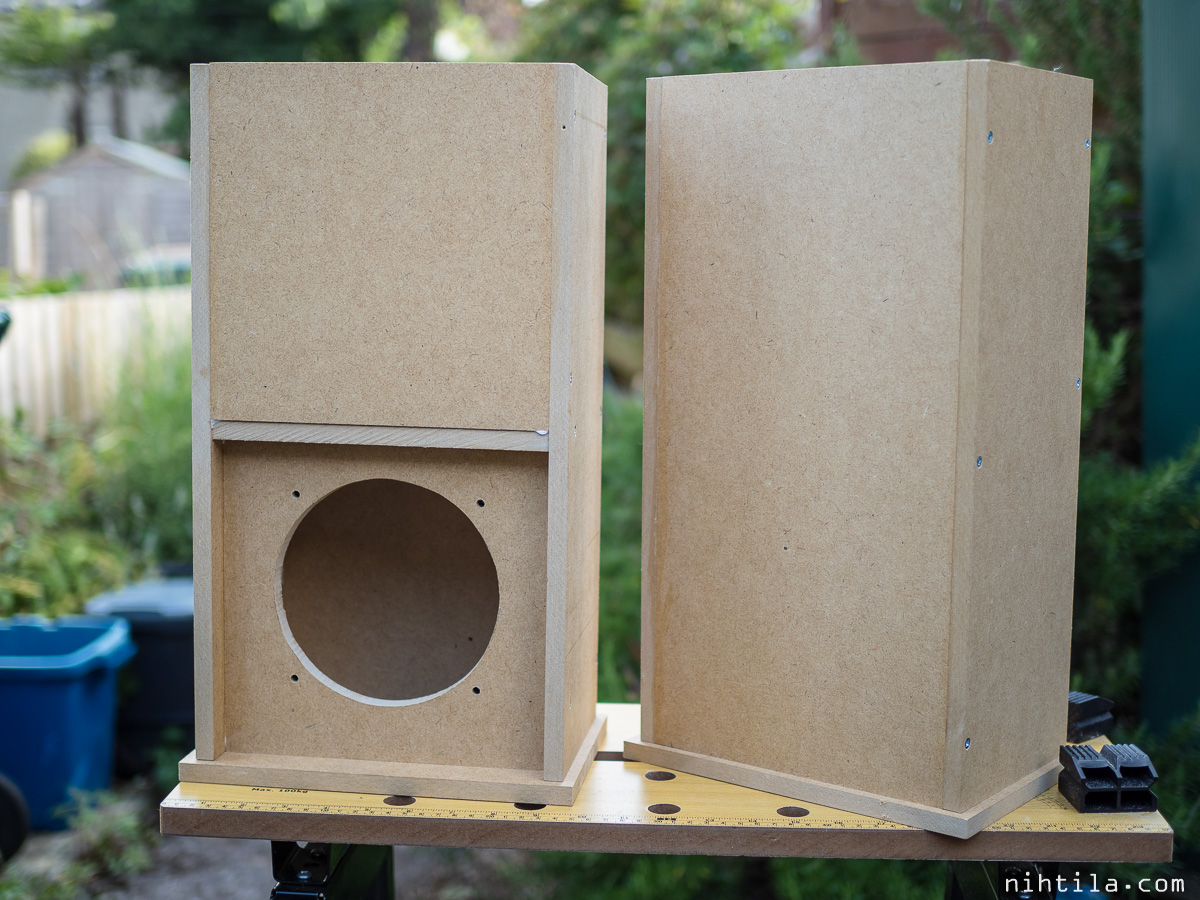
Outside surface does not need to be perfect as it will be covered with fabric
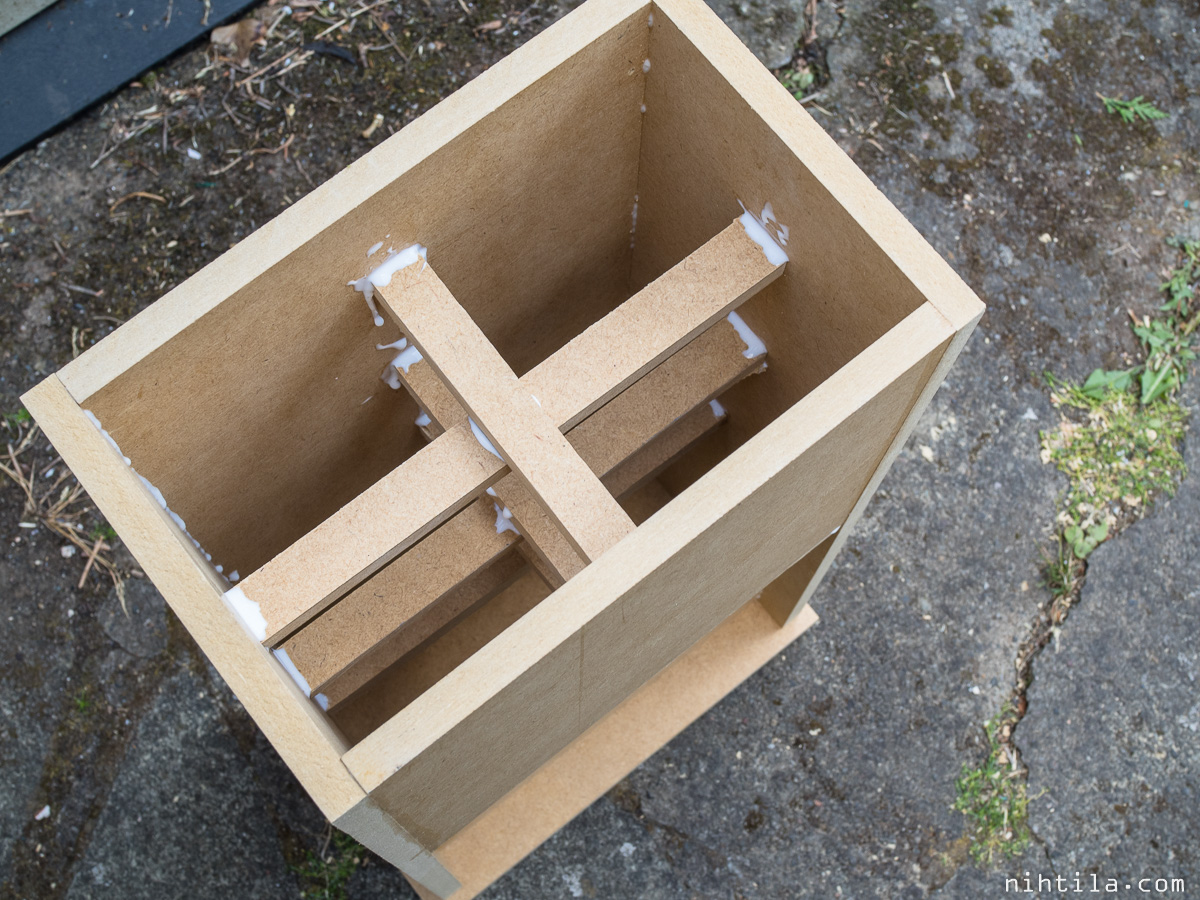
Internal support bits
At this point I unfortunately did not take photos. Next step was to paint the top and bottom (which is not glued in the above photos, just screwed) plates white and the rest of the cabinet black(ish) so that nothing is visible under the fabric. I used spray paints.
When painting was done, I placed a little bit of polyester damping material inside before glueing the top plate.
Ready for final assembly, I glued the top and bottom plates. Top plates do not have any screws so I placed enough weight on them for overnight pressure.
Glueing in progress
It is not really visible here but the black paint job looks quite awful – the point was only not to let anything be visible through the fabric. White parts needed to look good as they would be visible.
Isolated speaker measurements
This was the first time I performed any kind of speaker measurements. I use a miniDSP UMIK-1 microphone I have bought for room acoustics measurements. It is very simple to use, as a USB device there is no need for an external mic preamp.
The software I use is Room EQ Wizard (REW), also used for room acoustics measurements. It is very easy to use and also recognises UMIK-1 automatically and asks for a calibration file which is provided with the microphone.

UMIK-1 USB measurement microphone
Speaker measurements is another vast field I am no expert of. The trickiest part is to separate room acoustics from the speaker measurement as not many of us have an anechoic room to use. Luckily subwoofers are slightly simpler to measure than multi-way speakers, especially if the cabinet is sealed which means there is only a single source of sound.
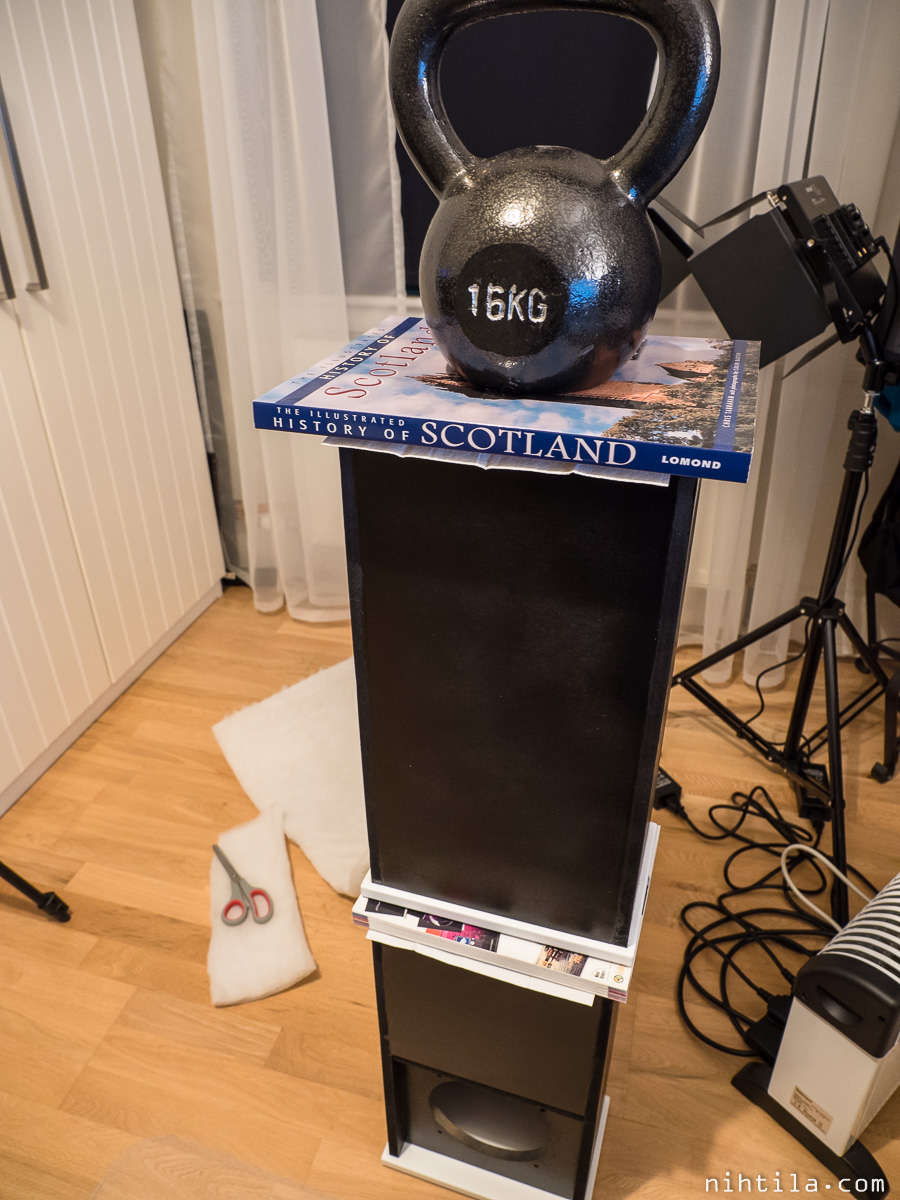
I read Audioholics Subwoofer Measurement Tactics which compares various measurement methods and chose suitable method. One common method of measurement is outdoors, placing the subwoofer and microphone as close to ground as possible and take that solid surface into account – so called ground plane method. Another usable method is near-field measurement that can be done indoors as well. SPL scaling is trickier with this method but I was only interested in the frequency response and not absolute SPL so indoor near-field measurement was a good choice. Scottish autumn weather made the choice even easier.
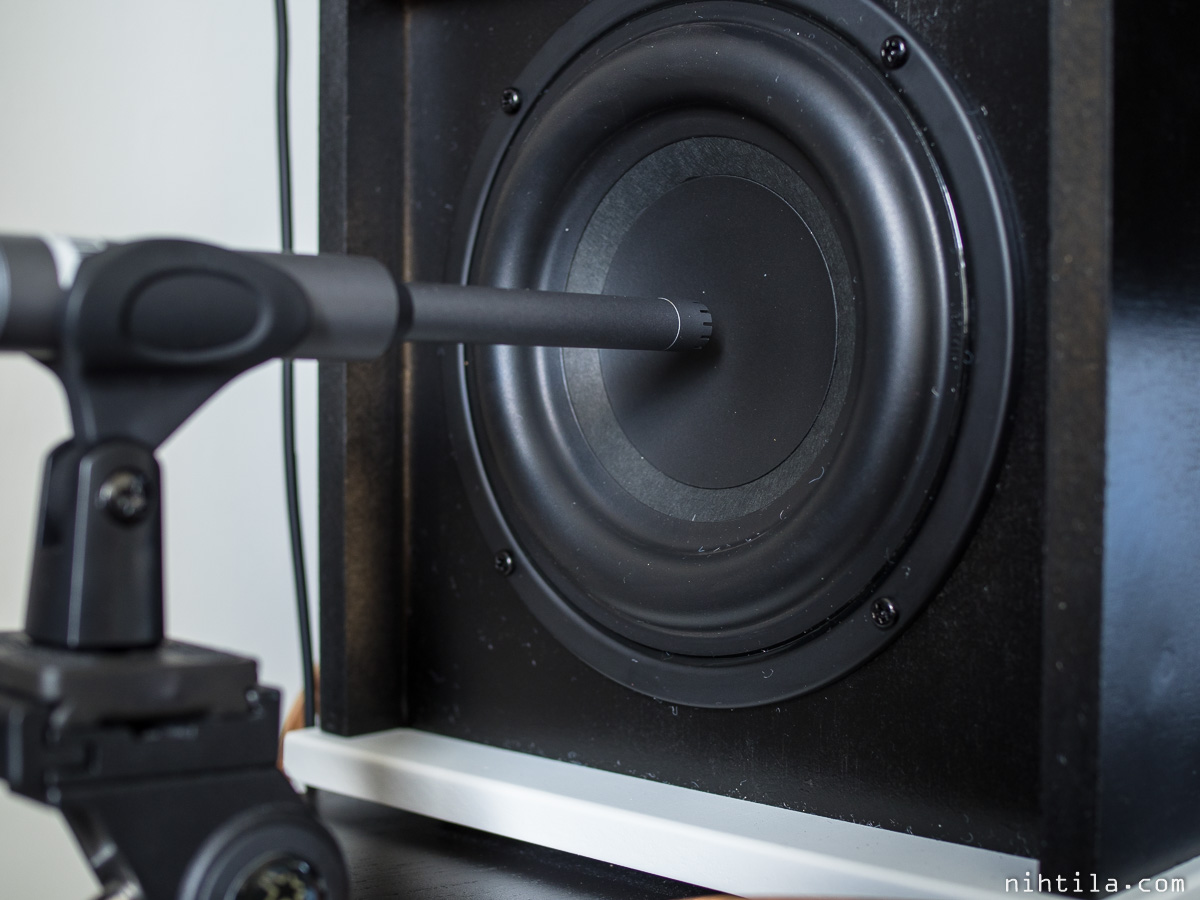
Measuring bass stand using near-field method
Measured graphs
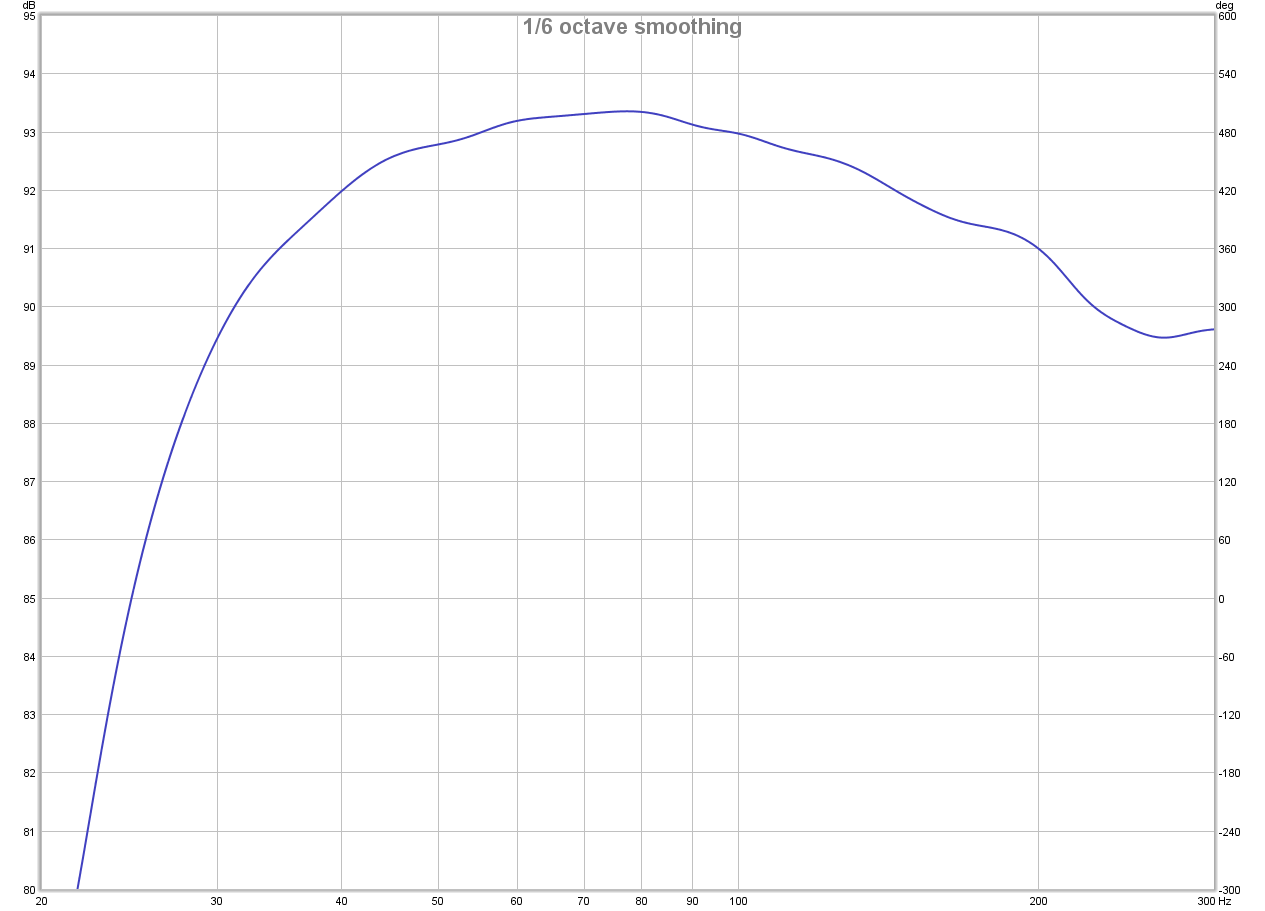
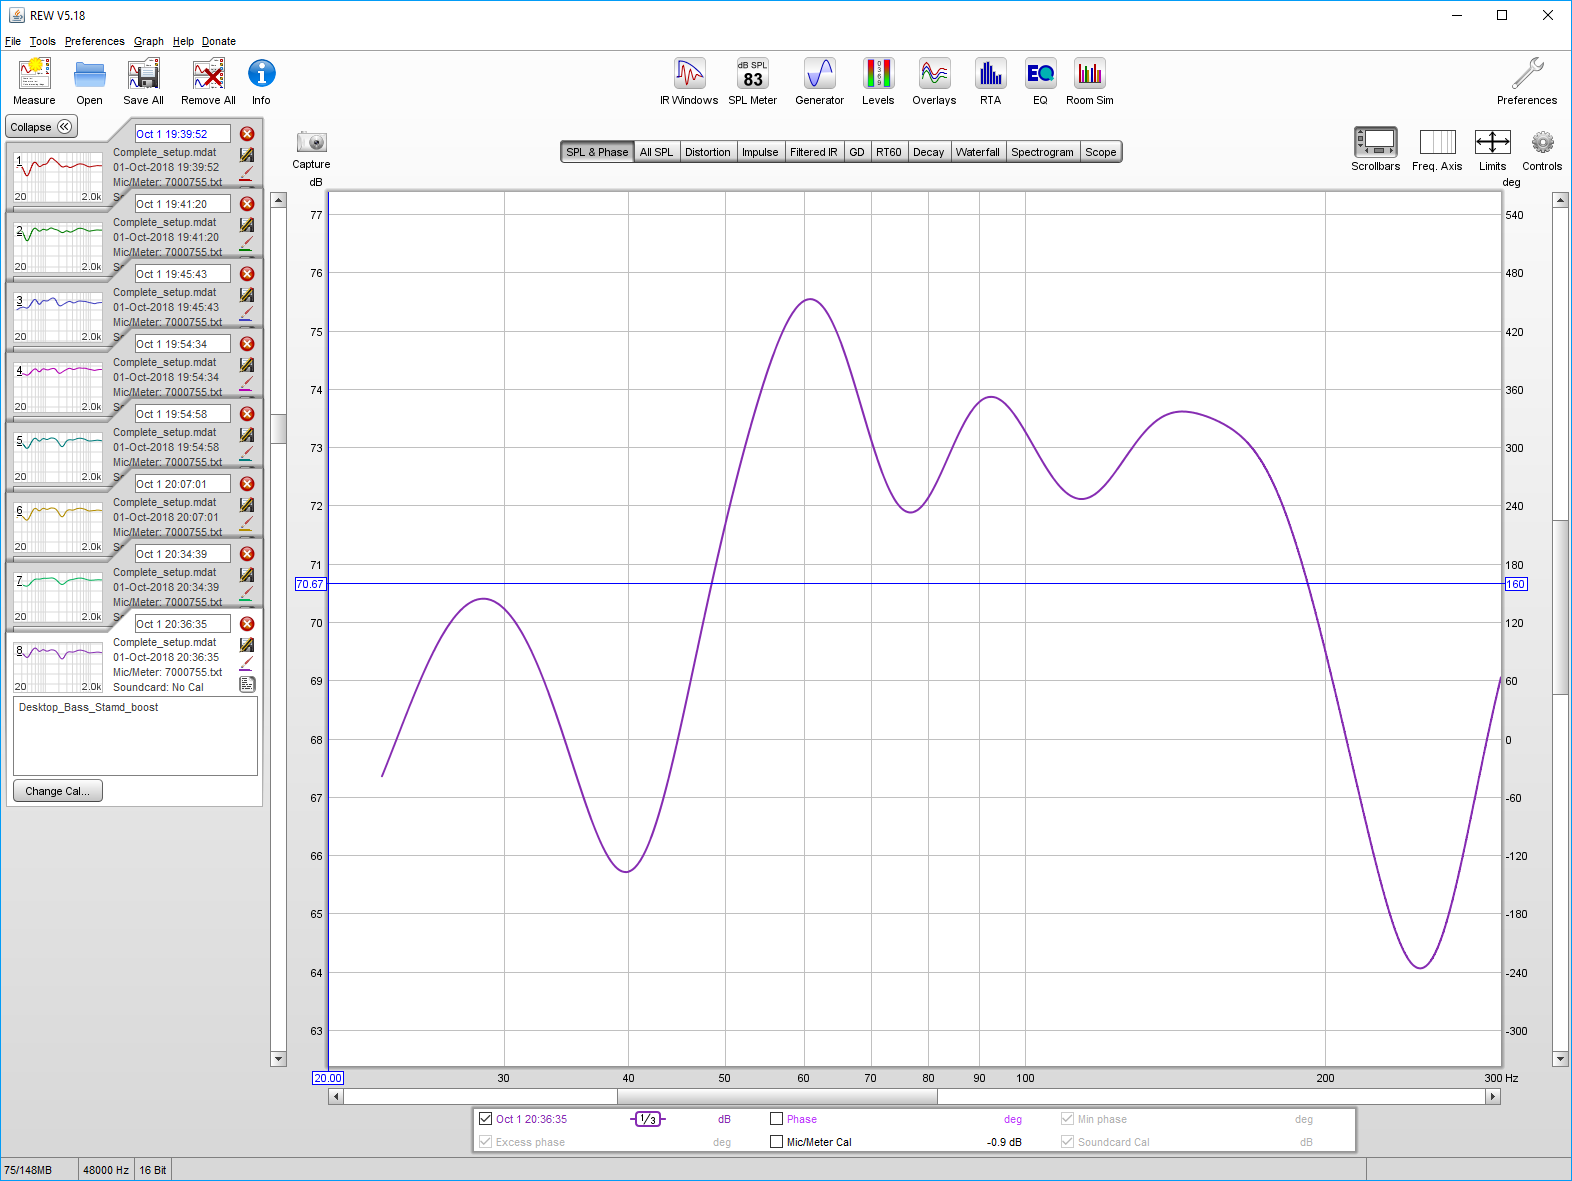
Below is the response without any filters. I am not sure why the response falls when getting over 100 Hz, or is it only a measurement thing. Or other way around, does the response peak at around 100 Hz? Therefore, it is also a bit difficult to say what is the -3 dB point. Anyway, it looks like it goes lower than in the simulation.
Note that SPL figure is nonsense in these measurements.

Without filters
Next I added the LT based on the simulation, not on the previous measurement. At least it’s doing something although it also exaggerates the boost.

LT added
Next I added a high-pass filter at 22 Hz.
LT and HP filter
This was now the starting point for the combined measurements with Genelec monitors and the room itself.
Side tones at low frequencies
When performing the measurements, the reality kicked in as well. At full LT boost I started hearing odd side tones at quite low volumes already. These are especially clear when performing sweeps on REW. Tuning subsonic high-pass filter helps lowering or getting rid of these. The higher the filter frequency, less artefacts can be heard but then we also start cutting the response. Compromises, as always. However, this is probably the most serious, unexpected (although from little experience not completely unexpected) and performance-restricting phenomenon.
Finishing off the stands
I attached the fabric rather quick and dirty way using a piece of cardboard as a ‘support’, then just stretching it around the stand and attaching in the back using small nails as the back will not be visible anyway.
As can be seen below, the fabric is still slightly wrinkly but it flattened after being stretched for a while. I also adapted the ‘good enough’ mentality here instead of ‘perfect’ as they will be hidden behind monitors anyway.
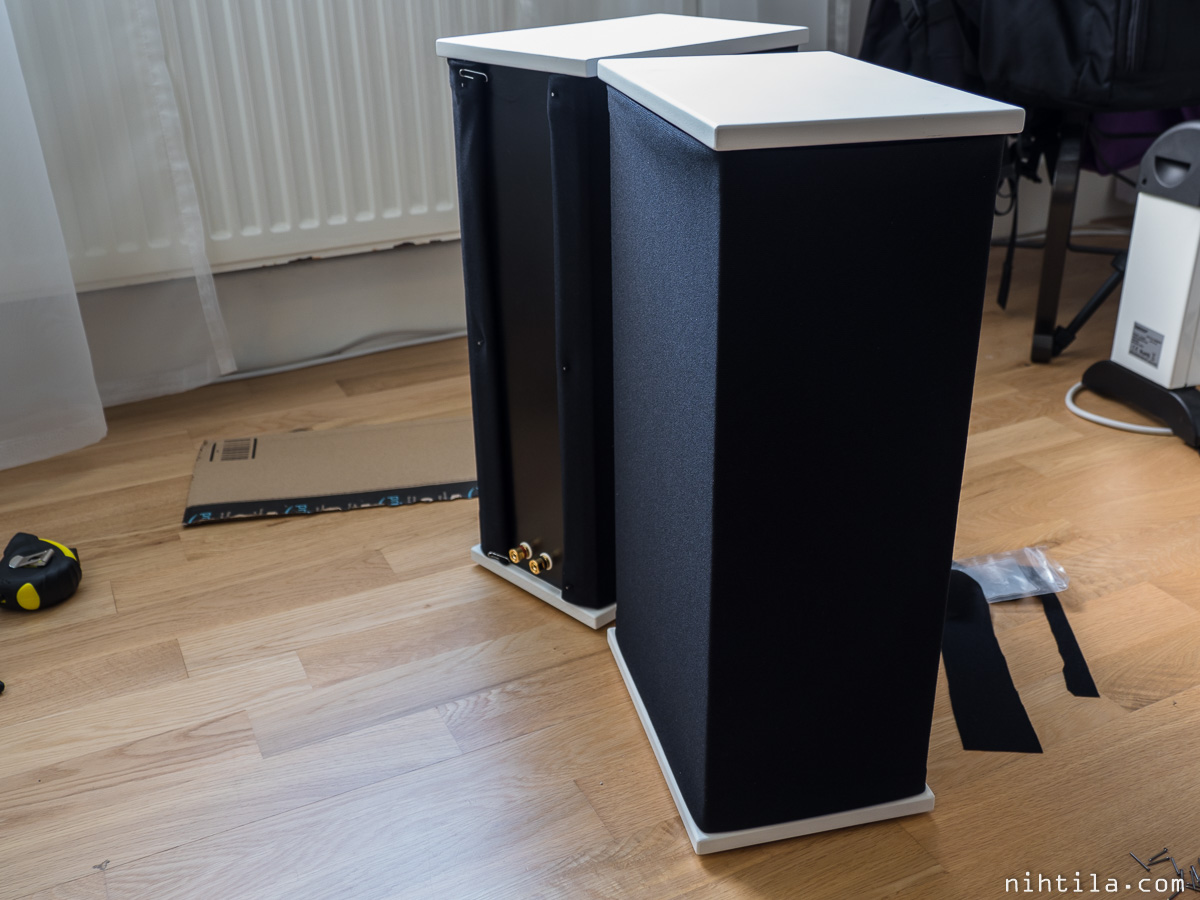
First try of stretching the fabric; a bit wrinkly but almost there
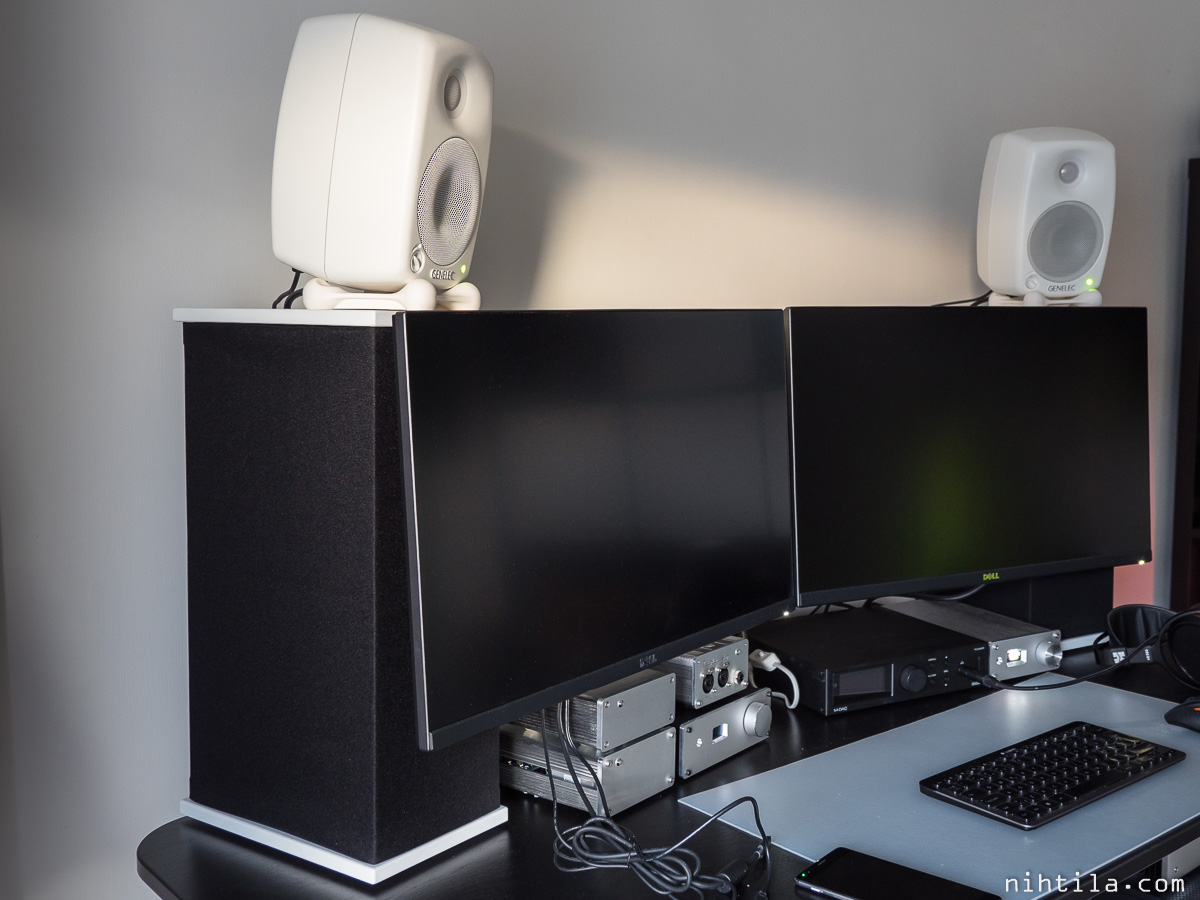
Bass stands on their place on the desktop
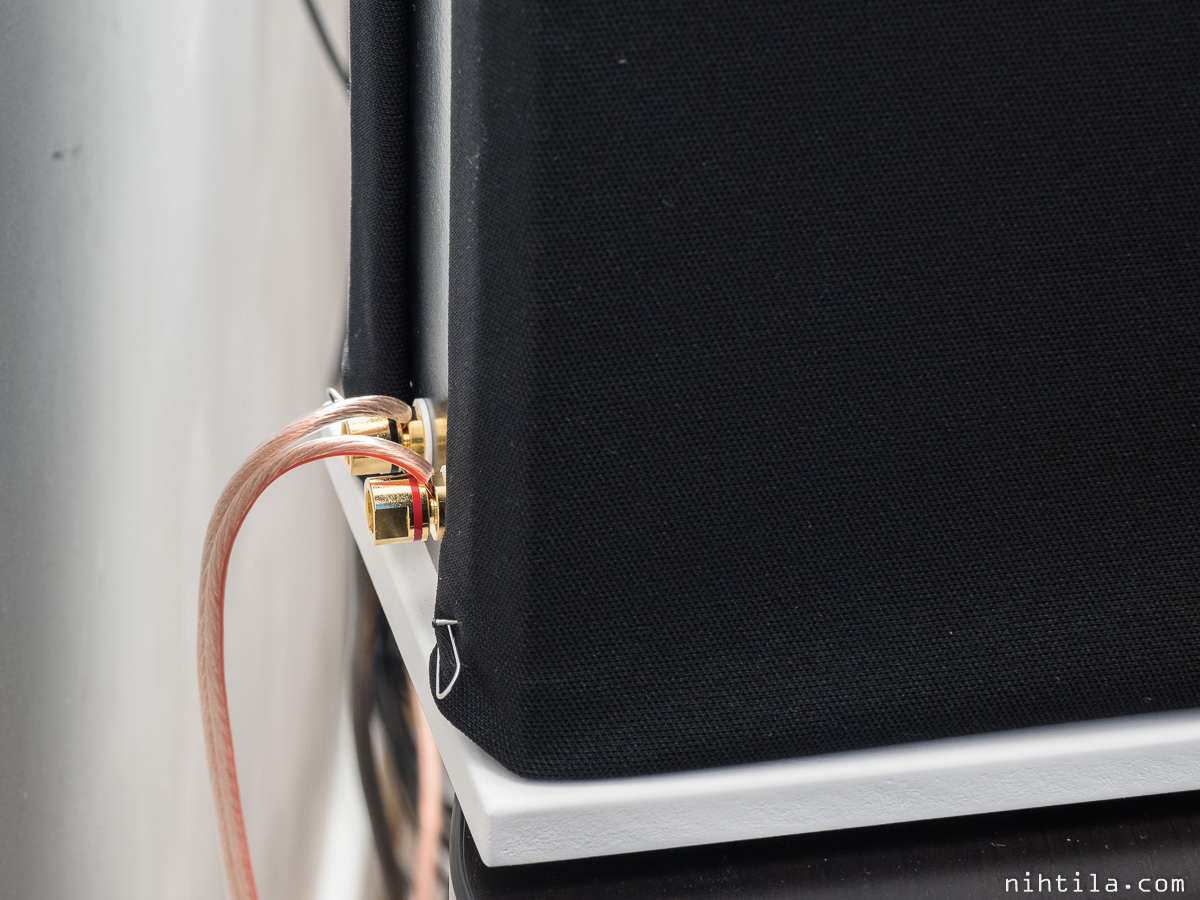
I did not even try to hide paper clips and nails at the back – they’re not visible
I use my Hypex UcD180 amplifier to drive the bass stands. Its 2x 180 W is way overkill as the excursion limits come at few tens of watts; however, I just had that amp without any use for now.
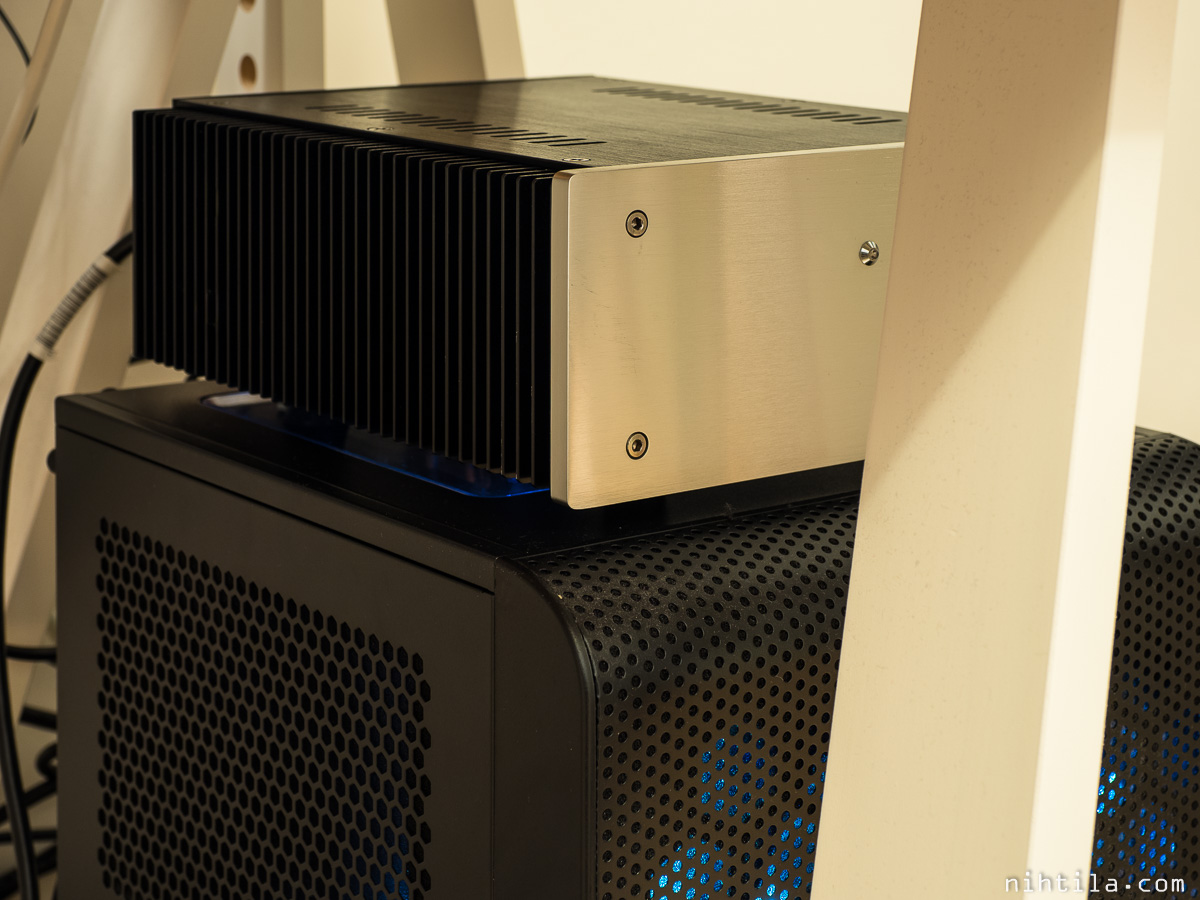
Hypex UcD180 based power amplifier on top of my PC under the desk
Very brief introduction to digital room acoustics correction
Next task was to use the miniDSP to make the bass stands, Genelecs, and room work together as well as possible.
Acoustics, acoustic measurements, and digital room correction (DRC) are all vast topics. You do not need to be an acoustics expert in order to perform room correction but knowing the basics helps. It’s all physics so certain laws set the limits what can and cannot be done. Few basic things:
- Sound is waves, and wavelength is (inversely) proportional to frequency.
- These waves reflect from surfaces, get absorbed by materials, and form standing waves between walls, floor, and ceiling.
- In order to alter these waves in any way, an object with dimensions relatively large compared to the wavelength of interest is required.
- For example, mid and higher frequency reflections can be damped by hanging few cm thick acoustic panels on walls and ceilings; however, these have no effect on low frequencies.
- In order to change low frequency behaviour where wavelengths are in the order of metres, large structures are required or things (such as speaker or listening spot) must be moved several metres to make a difference.
- Standing waves form crests and troughs in the room, depending on the dimensions and frequency; these can make 10 dB differences in the bass response.
- Crests can be flattened with DRC but nothing can be done on troughs with DSP as we cannot add huge boost.
- Best way to affect troughs is physically moving things around but at low frequencies this may mean moving them few metres.
- When measuring and using both channels, microphone sees the superposition of left and right channel waves; at low frequencies moving the mic slightly does not change anything but at high frequencies the phase difference changes the superposition completely.
- Due to this digital room correction is used only up to few hundred Hz.
- Shelf-type filters can be used for higher frequencies as well to adjust overall tone, but do not try to flatten the response above few hundred Hz.
Measuring speaker + room response
Despite all complexity, luckily getting started with UMIK-1 and REW is easy, and playing around teaches a lot.
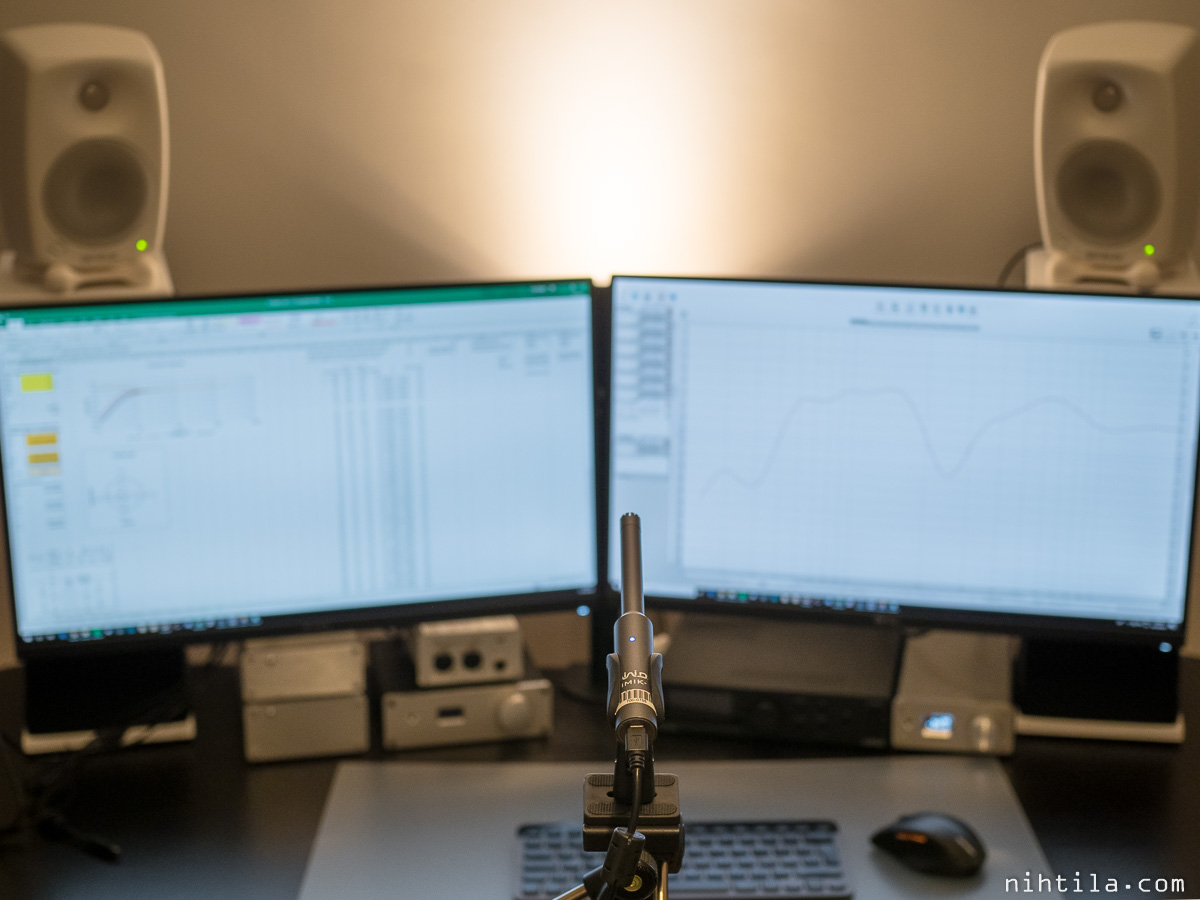
UMIK-1 placed at my desktop listening spot using camera tripod
Very briefly:
- Download, install, and launch Room EQ Wizard (REW) software.
- Place the UMIK-1 microphone at your listening spot (I use camera tripod) and plug it in. REW recognises it and asks for a calibration file you get with the microphone.
- Click measure, give frequency range of interest (e.g. 20-300 Hz), check levels, and hit go and you will hear a frequency sweep.
- Look at the graph which is probably far from flat! In practice some smoothing is always used.
- Hit EQ button, choose used DSP and start tuning the filters. Export filter coefficients.
- Load filters to your DSP.
- Re-measure.
- Continue until happy (or too frustrated to continue).
Room EQ Wizard
Unfortunately the following may be the reality of many acoustics measurements – the difference between tops and lows can be easily 10 dB.
Smoothed REW measurement
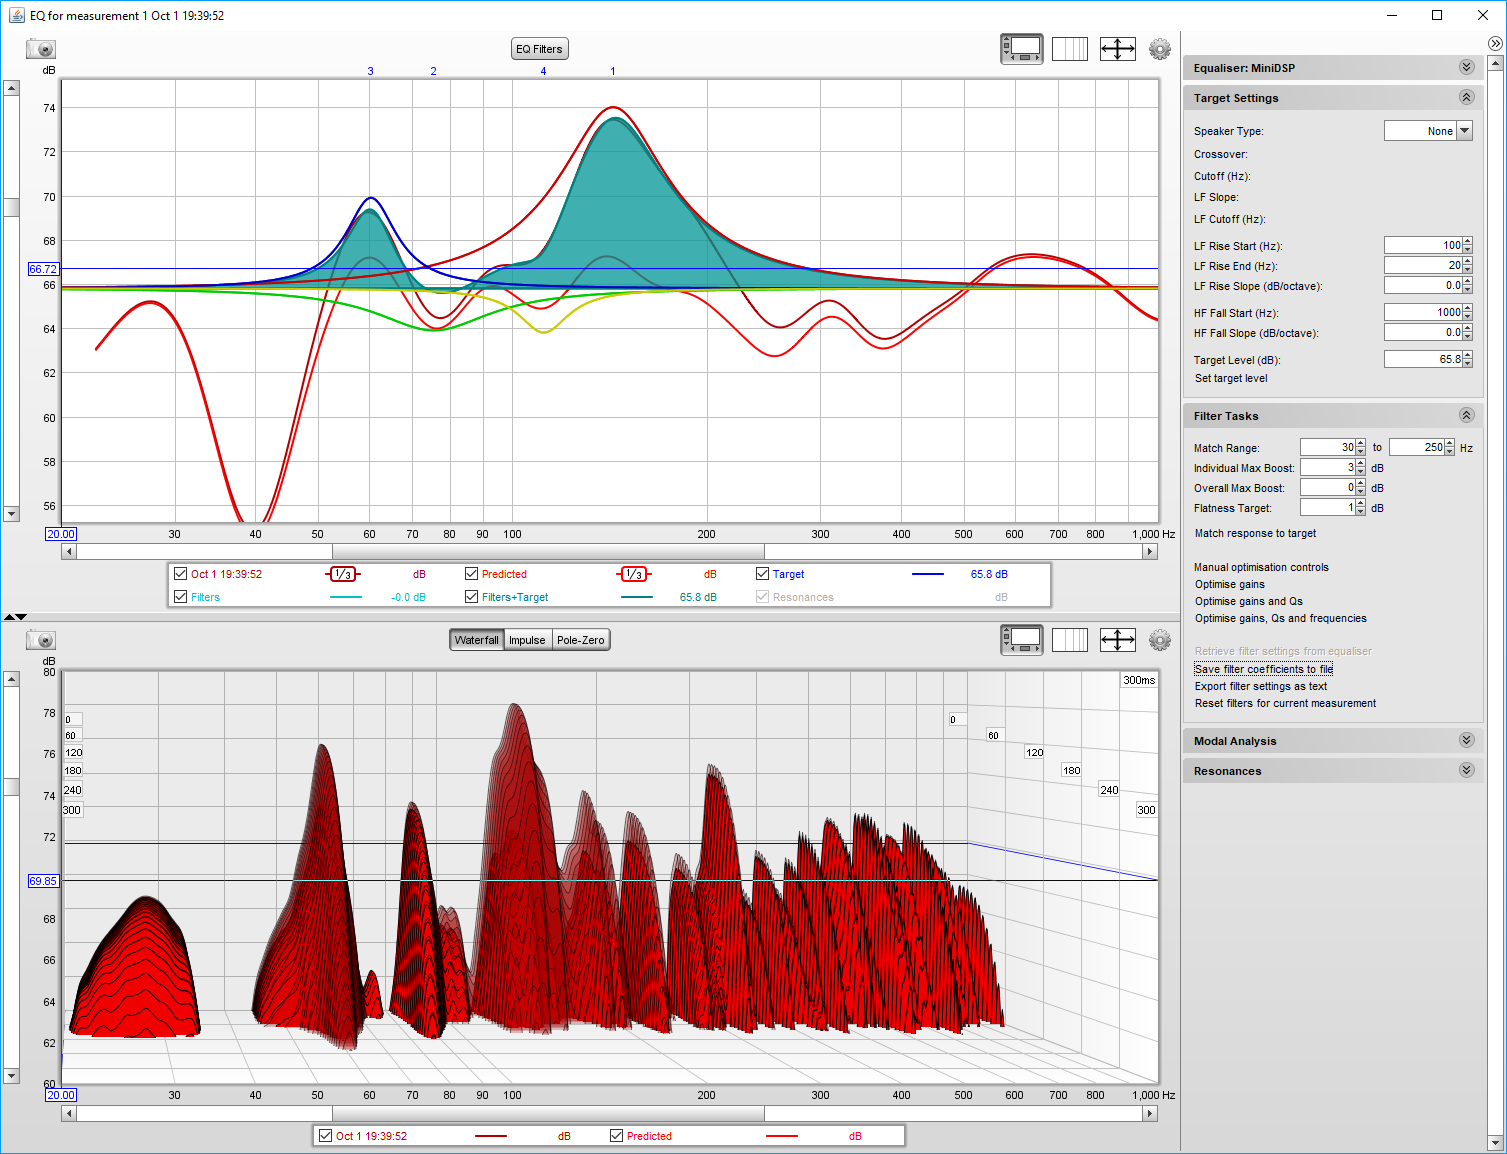
Filters are created in EQ page, then exported as text and loaded in DSP
Mostly things work plug-and-play with UMIK-1 but in some cases it is necessary to adjust Windows sound settings and levels to get things working. However, absolute levels do not really mean anything in room measurements.
I start measuring one channel at a time and set up filters per channel. In low frequencies stereo should give no big surprises after tuning each channel.
If you have a subwoofer, getting the phase right is also easy with measurements.
Setting up miniDSP
I use my miniD preamp which has miniDSP inside, followed by 4-channel analog output. The miniDSP plugin in use is 2-way advanced 2.1. Following screenshots give an idea what is going on there.
Here it can be seen that LT filter is just a shelf filter.

Linkwitz Transform on Bass Stand channel
Bass Stands have HP and LP filters and main channels HP filters.

HP and LP filters
Room correction filters are the ones created from REW using the EQ tab.

Room correction filters
Room correction wrap-up
This is a vast topic but you can get started by checking the resources in miniDSP website, especially if using their DSP. It is relatively easy to get promising results even when playing with the measurements and filters for one evening. How good the results are eventually is more a matter of luck (= your room) than DSP or measurement skills. When you have killed the highest peaks you probably notice flat response is not the most enjoyable and can then adjust things to taste.
Getting near-perfect results is very difficult but DSP still tends to give excellent return on investment in terms of sound quality improvement.

Unfortunately deep dips remain in my bass response
Overall conclusion
I would say the outcome of this project is pretty good but to be honest not quite as good as I had hoped. As a positive side the stands integrate aesthetically well on my desktop even though the fabric is not perfectly finished (yet). Moreover, they integrate sonically very well also. DSP implementation also gives plenty of options to play with when tuning the response.
As a downside they don’t go quite as low as I had hoped, and sound pressure limits are met very quickly. It was obvious these are not going to be disco machines. However, based on simulations and estimations I had hoped to get slightly more out of them. The biggest unfortunate aspect is that I have a dip similar to Mariana Trench at around 40 Hz – just where I would need the help of a room the most! Unfortunately there is very little I can do at this low frequency without moving everything in the room. In a different room the outcome could be quite different.
Due to heavily boosted lows, some side noise from the woofers can be heard at relatively quiet volumes already. This can be altered by increasing the frequency of the subsonic filter which of course starts to raise corner frequency. Anyway, after some tuning I was able to find a reasonable compromise.
DSP is a great tool here where I can adjust the response to get the most out of it but still avoid the low frequency artefacts. And especially if my room changes, I can hopefully even get a bit more out of these.
I could try another 6.5″ woofer that could work in such a small cabinet and have maybe higher power handling and better suited for Linkwitz Transform. If I would do something differently now, I probably would extend the dimensions so that 8″ driver could be fitted. But then again it would be different story to fit the cabinet nicely on desktop, and finding 8″ drivers to work on such small enclosure may not be any easier. Compromises, as always.
After all, especially after listening to these for a couple of weeks I do am quite pleased with the results even if the initial response was slight disappointment in terms of depth.
References and additional information
- miniDSP, manufacturer of affordable DSP boxes. Their website also contains some information on acoustical measurements and room correction.
- Room EQ Wizard, software for acoustic measurements
- WinISD speaker design software
- Linkwitz Transform
- Tang Band W6-1139SIF woofer
- Genelec, manufacturer of superb monitor speakers
Version history
This page version history
- 16.10.2018 Initial version
4 comments
Thanks for sharing your ideas and experience! What I would try in order to improve the bass response is to drive both subwoofers with the same summed mono signal and use this “multiple sub optimization” software: https://www.andyc.diy-audio-engineering.org/mso/html/. The idea is that it can time- or phase-shift one of the subs in order to “fill” the dip caused by the room mode. And it works with miniDSP.
Ok thanks I will check it at some point
Hello! Very nice setup! I am also looking for tiny sub driver for about 4 liters. ( i need 3 of them) Will you pick another driver today ( I can’t see an alternative) or just change highpass to make W6 stronger? I just need audible 35Hz so maybe highpass at 35Hz will be safer for the driver?
I would consider something a little beefier now. Depends on your main speakers, if they don’t go low at all then something like this can be enough. I am not using these stands at the moment as my house/room/setup has changed.
Comments are closed.